 "Zachary Oberle" (zacharyoberle)
08/02/2016 at 12:55 • Filed to: Project Hoondy, Adam's Garage, Cusco, Tuner Problems
 5
5
 5
5|
"Zachary Oberle" (zacharyoberle)
08/02/2016 at 12:55 • Filed to: Project Hoondy, Adam's Garage, Cusco, Tuner Problems | 5
| 5 |
Tuning cars can be a
nightmare
. It’s possible to pour countless hours of your life and dollars from your wallet into a vehicle to still end up with
nothing.
You can blow stuff up, ruin good parts, de-value a car, or just incidentally set fire to the whole thing. On a good day though, with the right parts and correct know-how, you can build yourself
one hell
of an automobile.
So too had it come to pass with Project Hoondy.
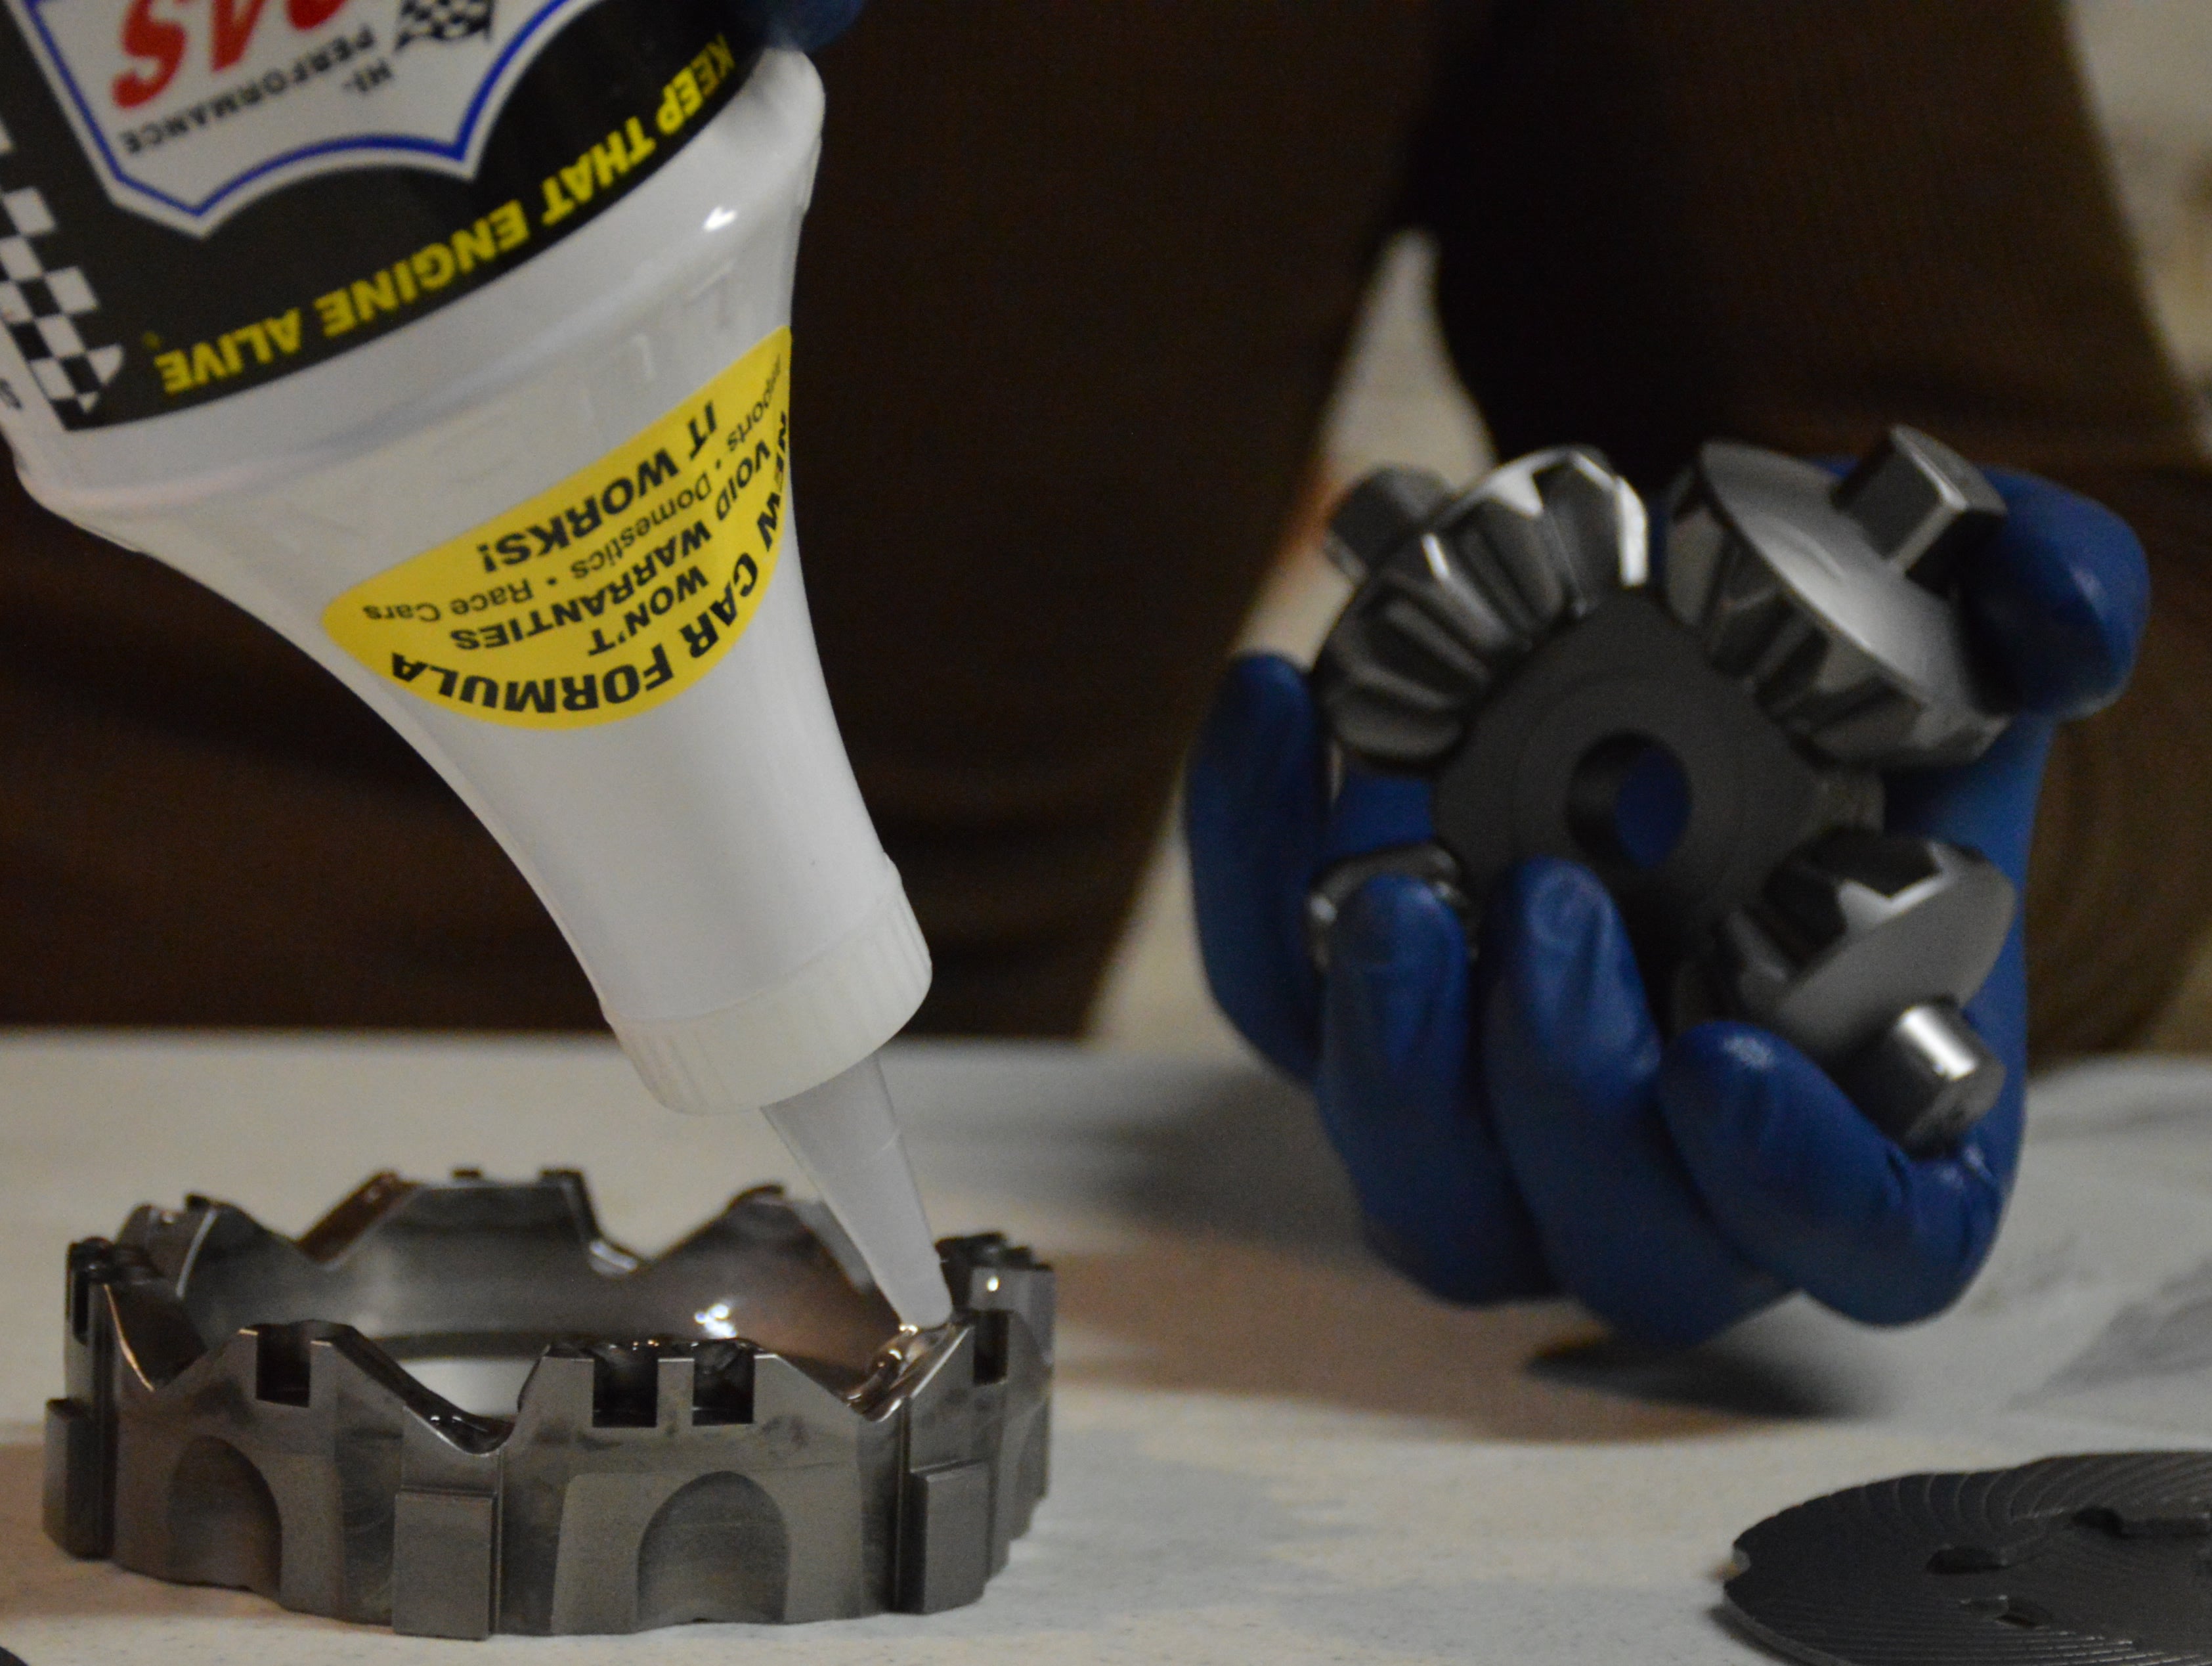
!!!error: Indecipherable SUB-paragraph formatting!!! Project Hoondy’s differential-to-be was poised and ready on the work bench. Slathered in luxurious !!!error: Indecipherable SUB-paragraph formatting!!! our modified Cusco RS represents some of the finest motorsport tech the proud country of Japan has to offer.
While we’re pretty confident mechanics, swapping out diff internals is no joke. So we returned to our friends at !!!error: Indecipherable SUB-paragraph formatting!!! to have the dirty deed done. Knowing we were going to do so, we decided to throw in a few other parts as “while you’re at it” add-ons:
We
might
have gotten a little carried away. A general rule in tuning is that you shouldn’t make too many modifications at once. You want to be able to know what parts resulted in what changes to the car’s driving dynamics. We felt confident in skirting this rule because all of what we were doing had been done before with great success. Nothing about this build is experimental.
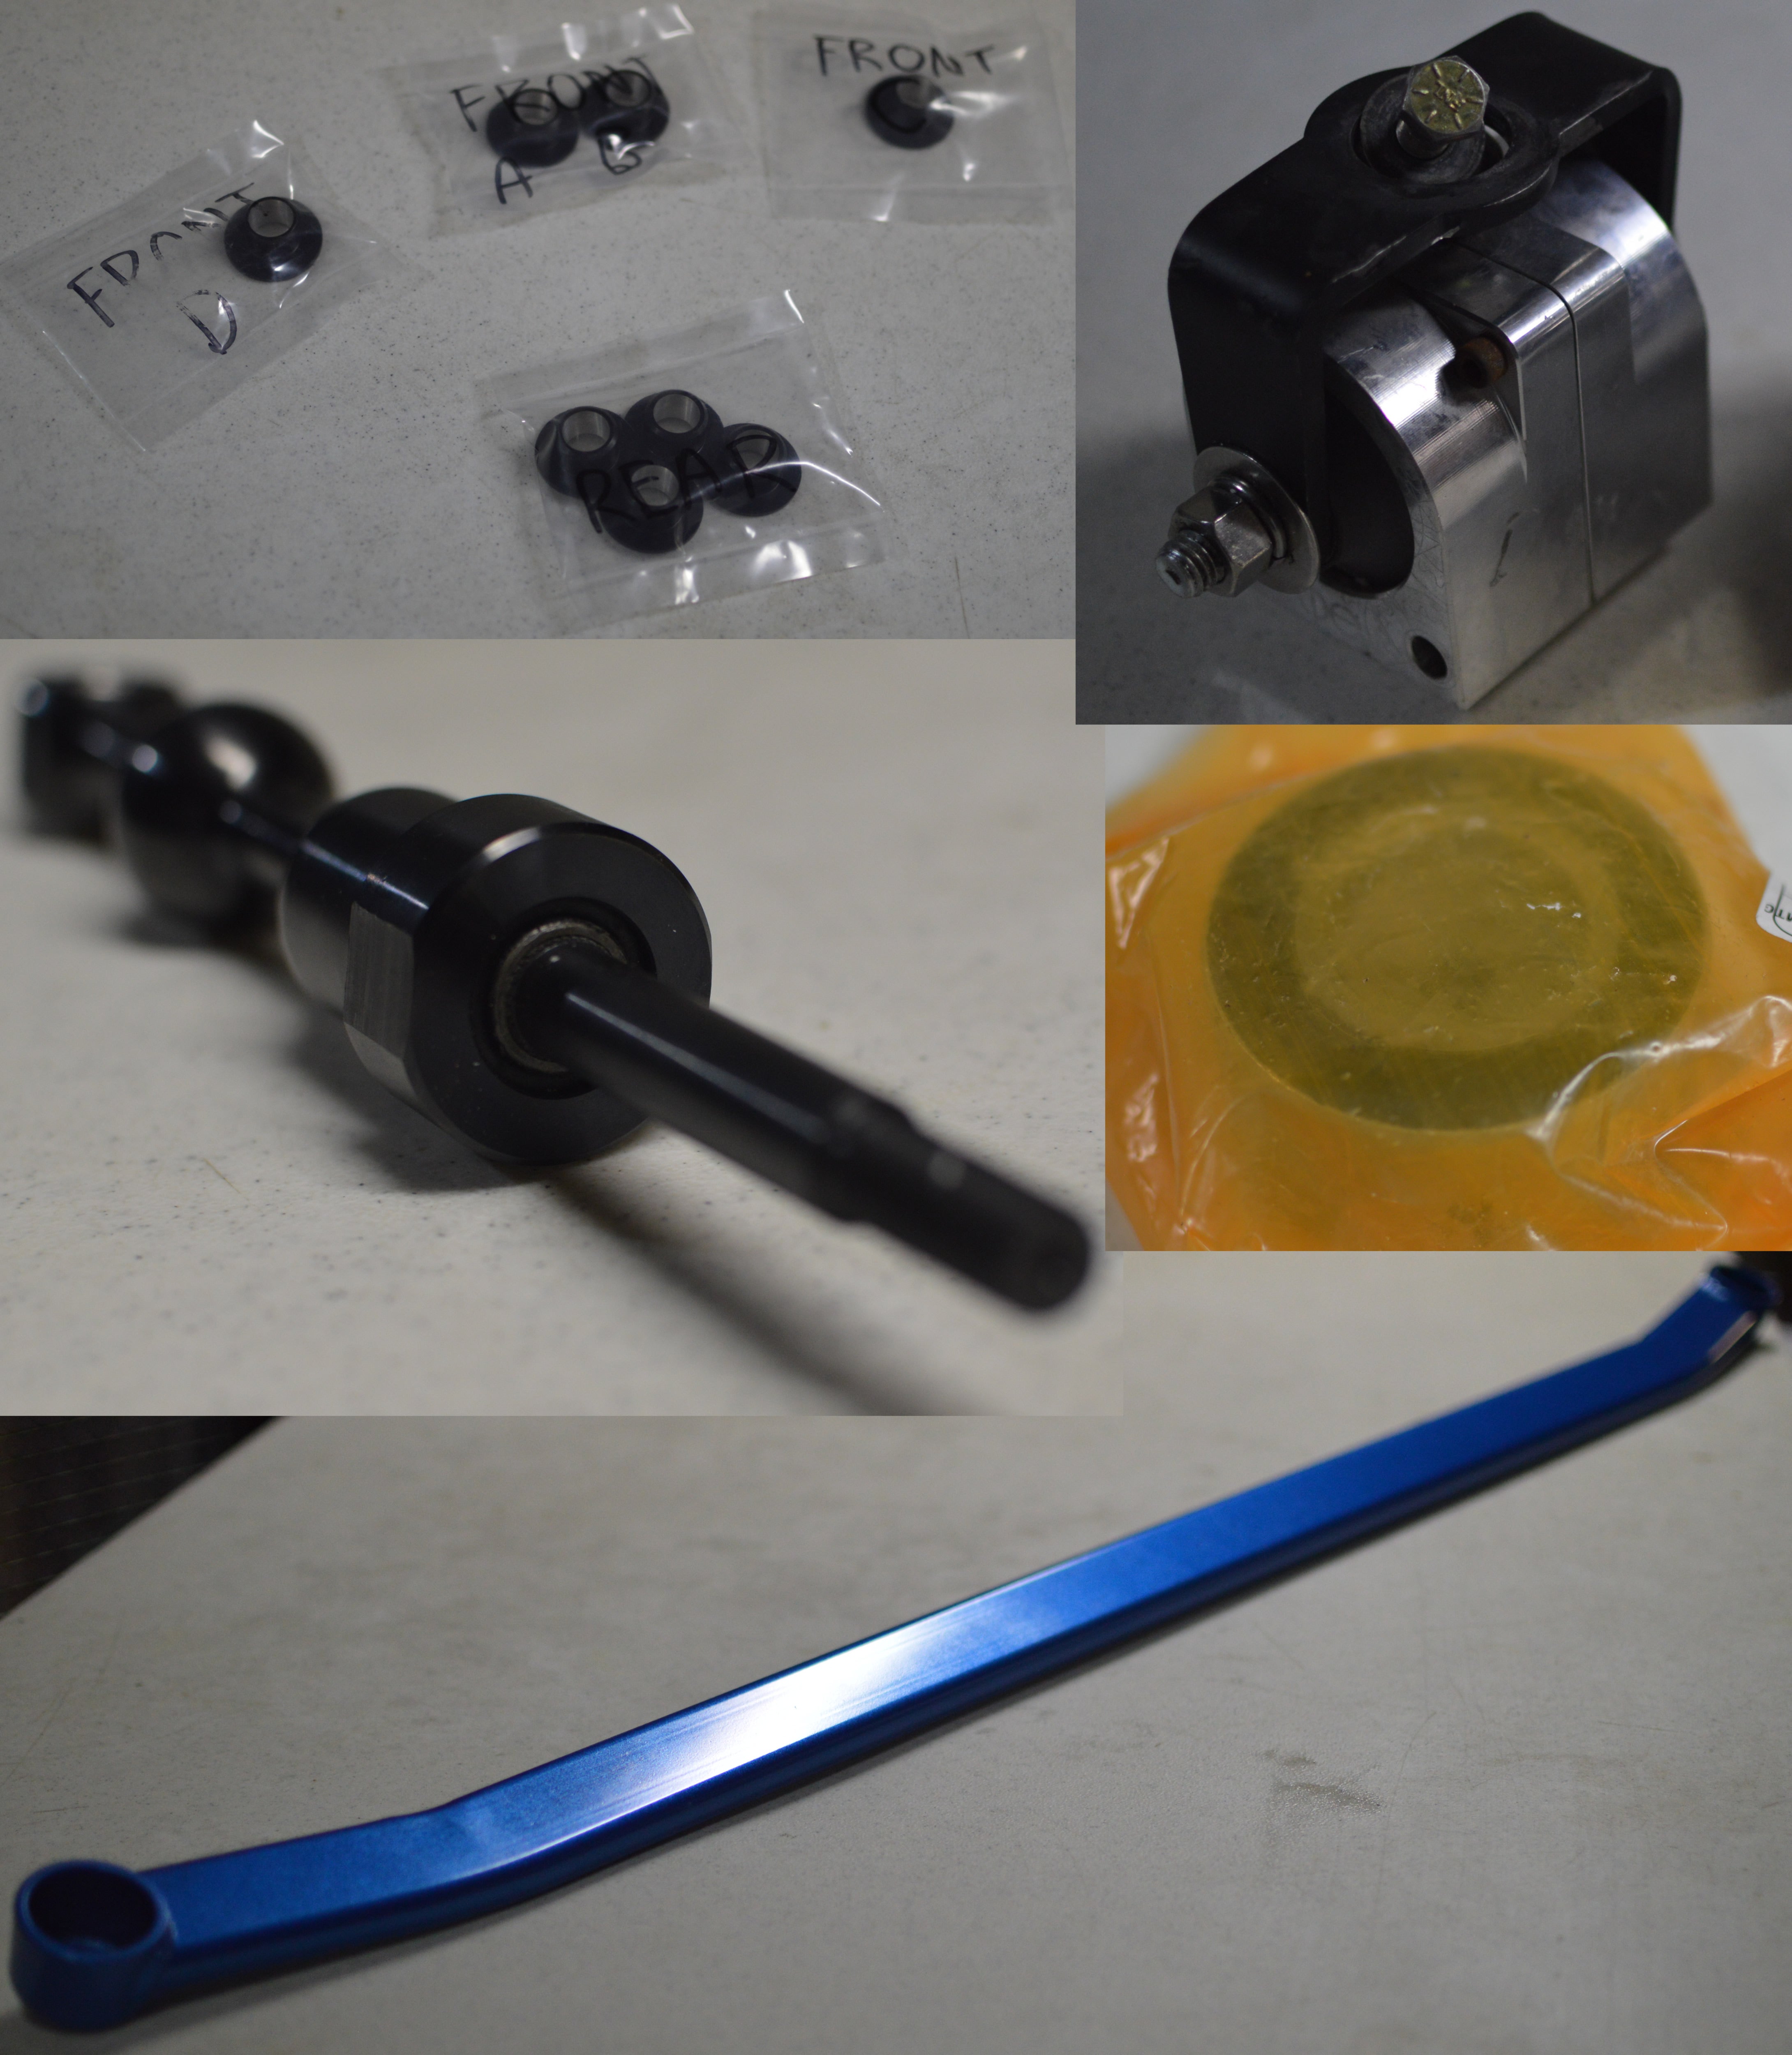
Our final roster for this part of the build was complete. It now included:
Cusco RS 1.5-way diff with full WPC treatment
Second rear OEM diff mount mod
TWS multi-piece short shifter
CP-E hard-compound engine mounts
Enthuspec subframe mounting collars
Cusco rear subframe brace
Suffice to say, these parts, and our !!!error: Indecipherable SUB-paragraph formatting!!! !!!error: Indecipherable SUB-paragraph formatting!!! ended up working together so harmoniously that our car legitimately feels like an OEM product. The sensation of solidity, compared to stock, is absolutely overwhelming. Project Hoondy is now a completely different car than it was when we rolled it off the dealer’s lot, and yet it has retained just enough civility to be a daily driver.
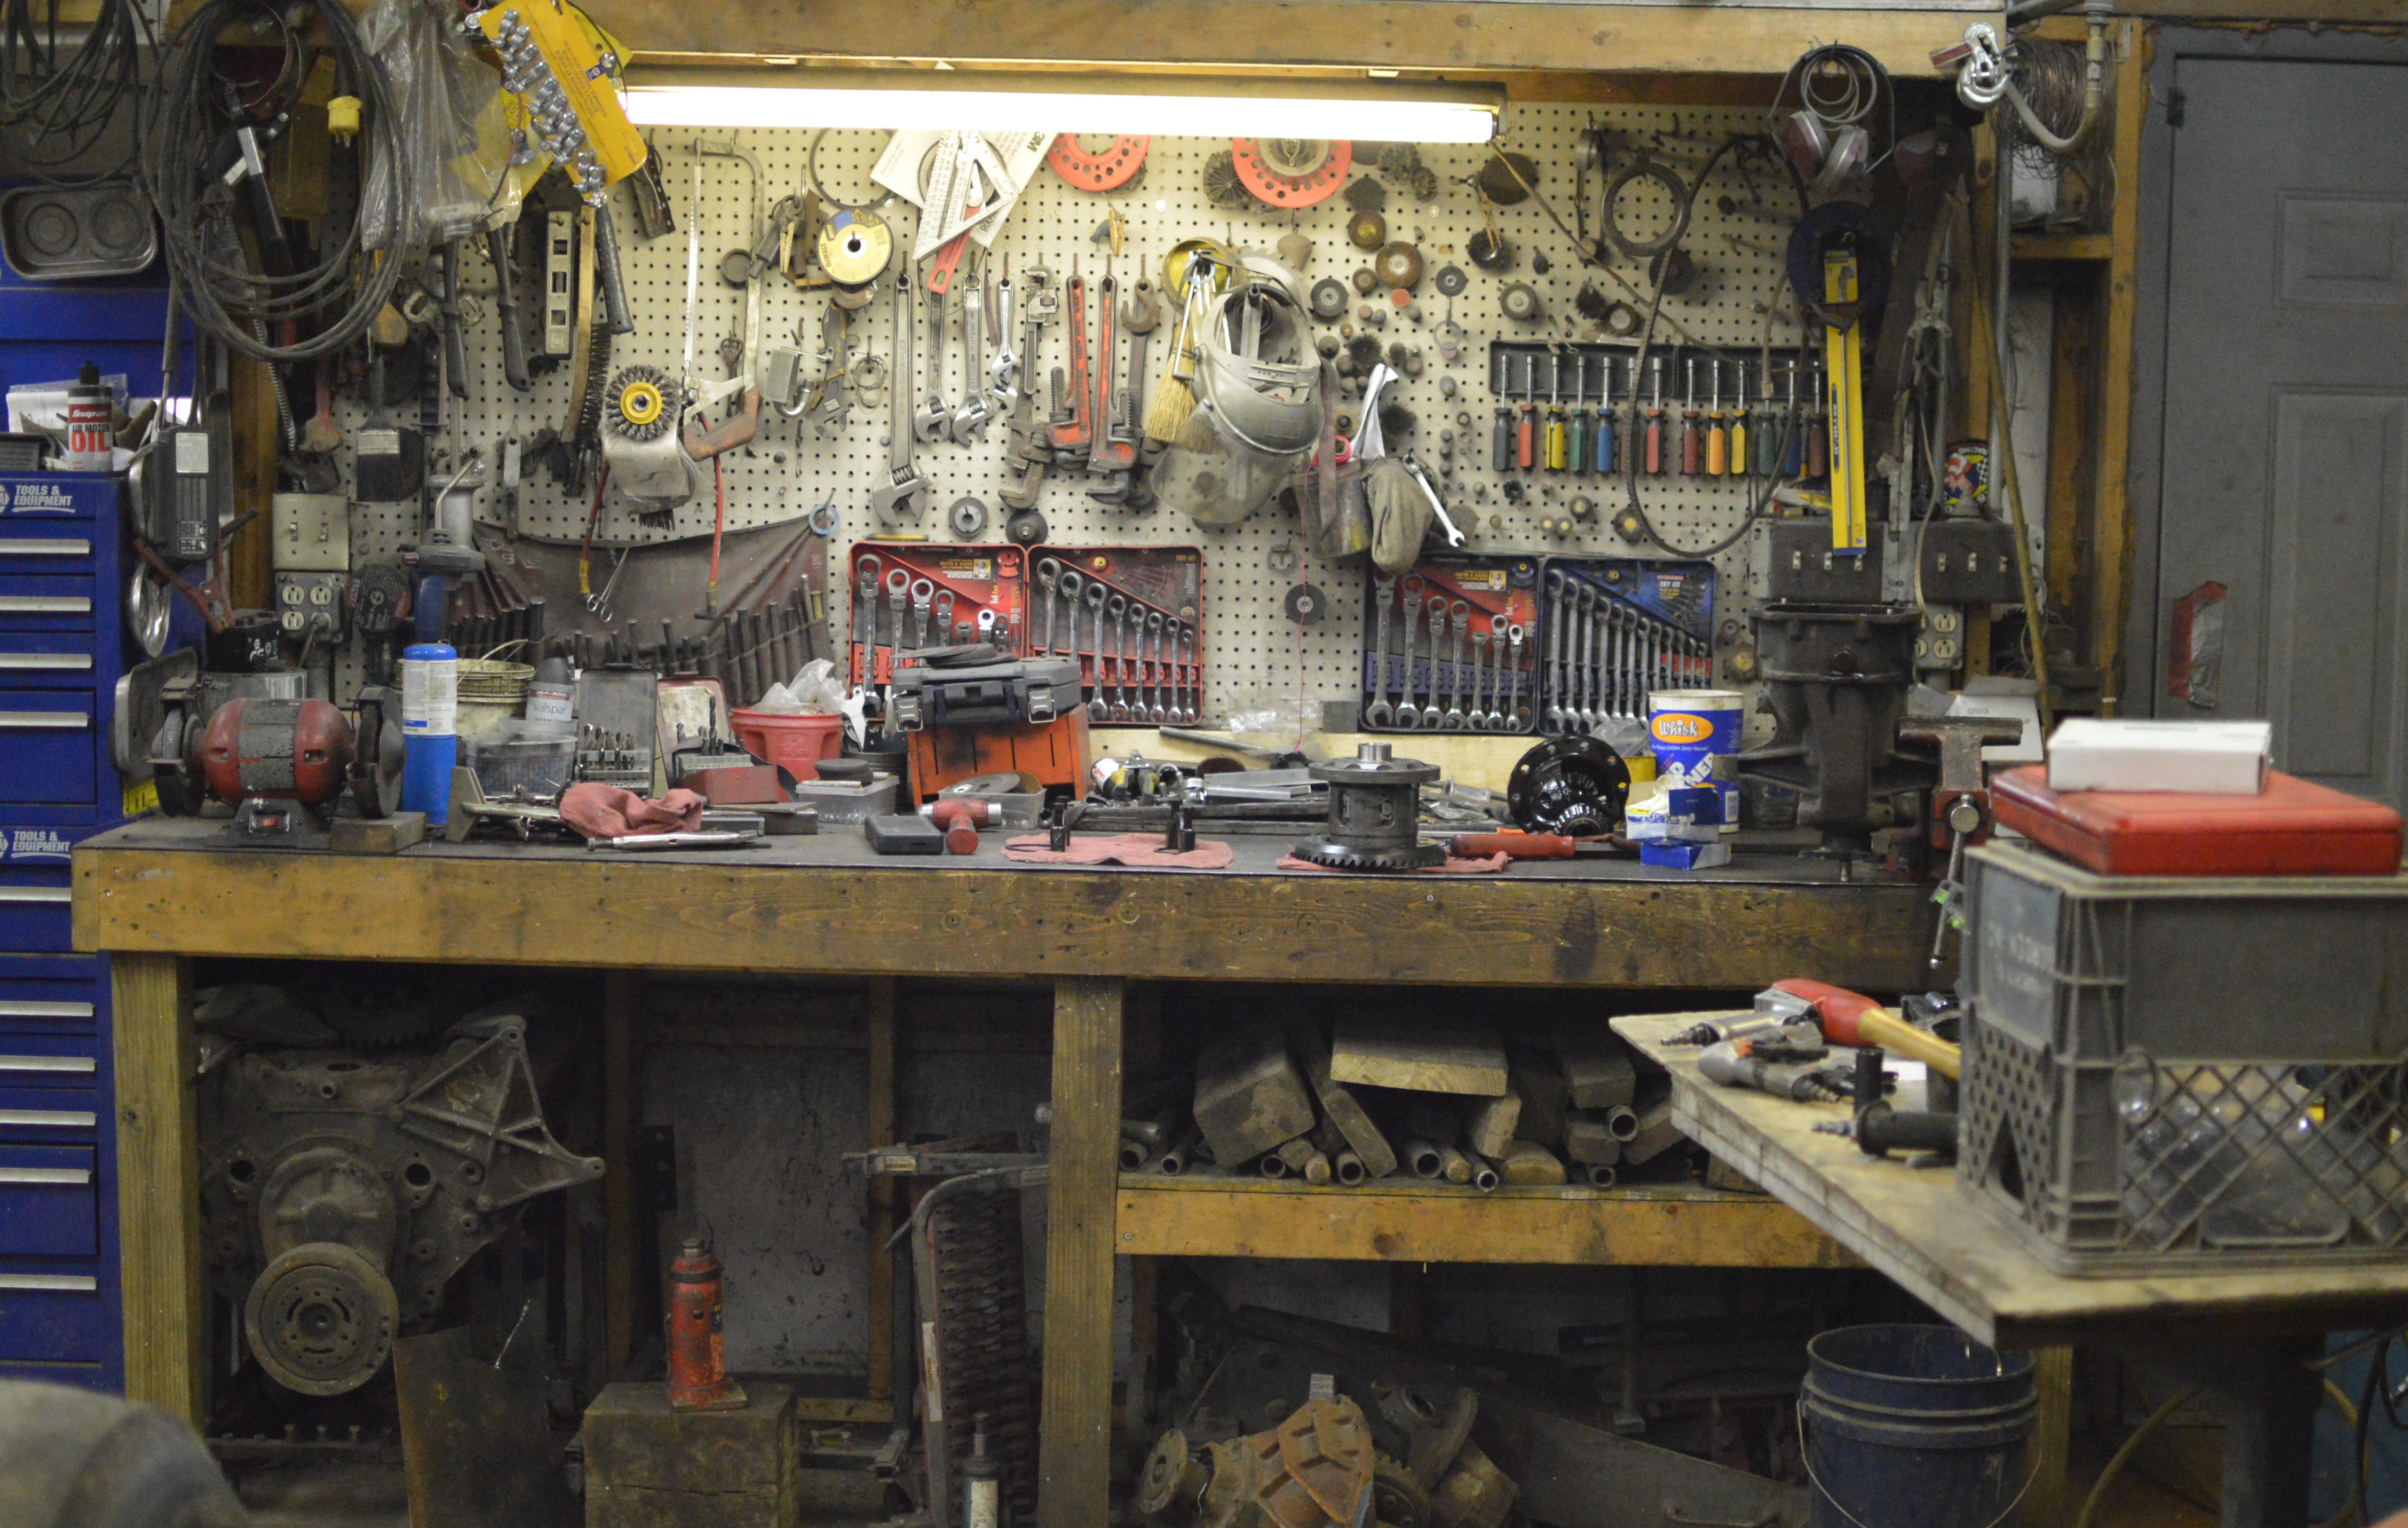
First though, we had to get the parts on the car. Adam had the wrench-turning on lockdown, but we weren’t out of the woods yet. We’d wracked our brains to try and come up with every little necessary part for this build, but, alas, we fell short.
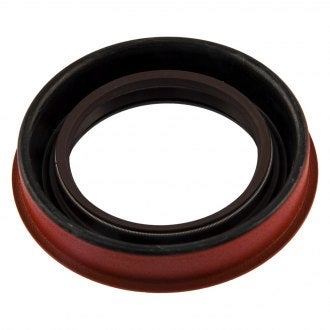
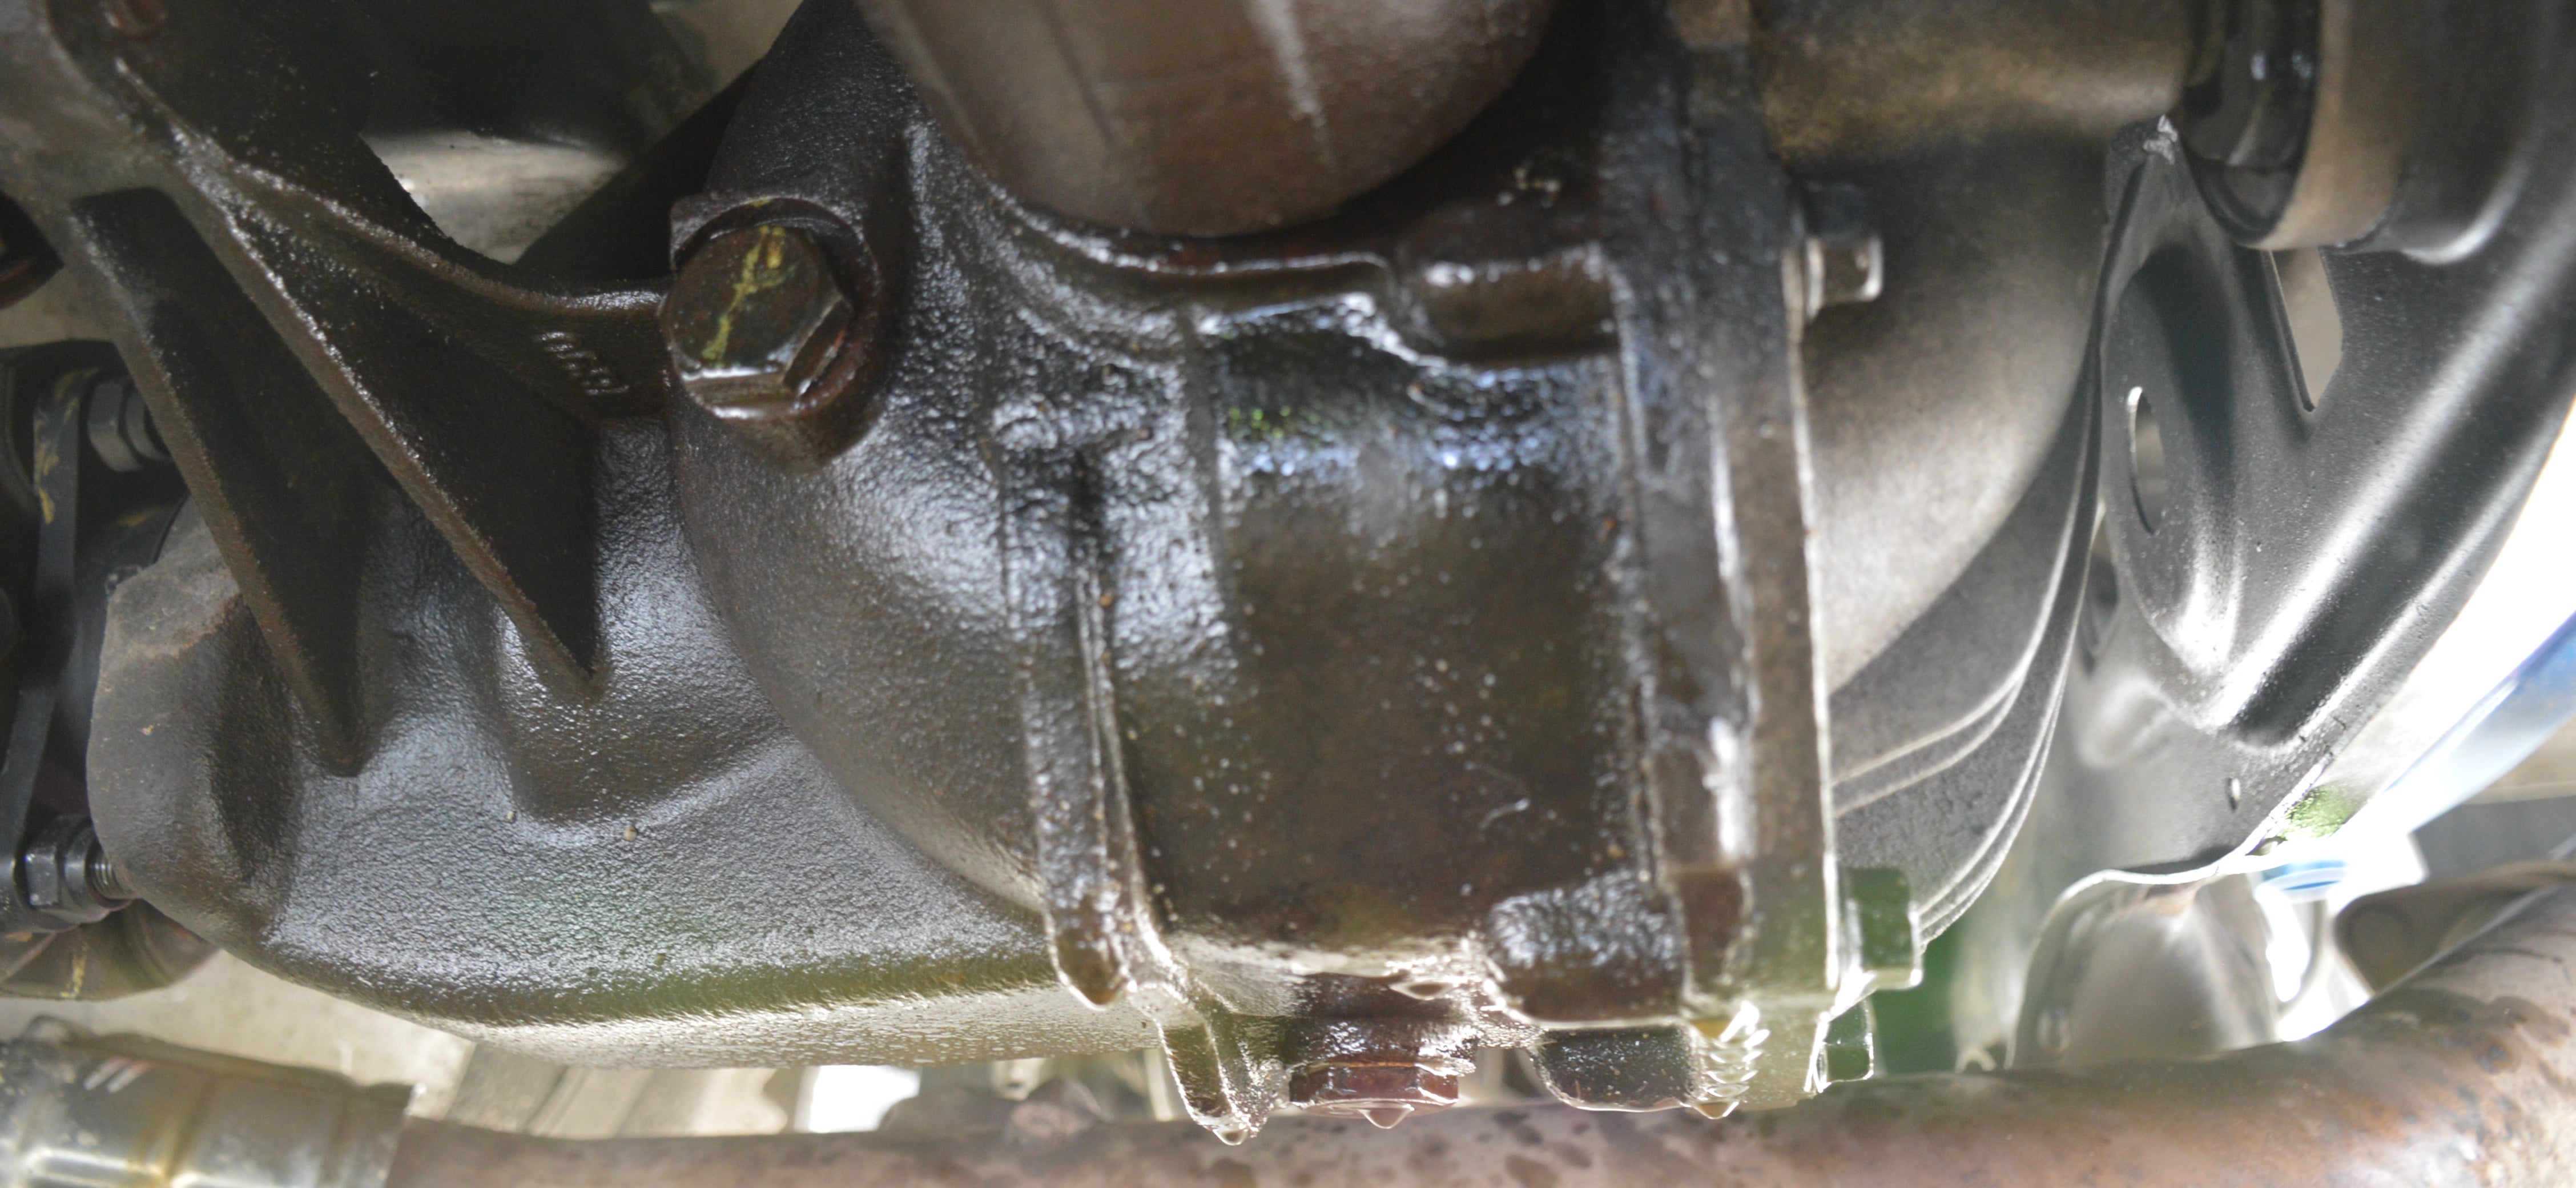
First up were the output shaft seals. Since the driveshafts would have to be removed and then re-inserted into the diff carrier the seals would inevitably be disturbed, and possibly damaged. Also, Adam thought our original seals looked dry-rotted. One of them appeared to have begun weeping a little oil.
So we had to put the build on hold while our local Hyundai dealer ordered in a new set of seals. We knew dealer parts would be more expensive than making an internet order, but we assumed this would be the fastest option.
It turned out that we had assumed wrong, because the parts department at our local Hyundai dealer is worse than useless. First they nearly ordered the wrong part even when the diagram was right in front of them. Then their pathetic dealer parts network took a week to ship the seals from Chicago , a mere 180 miles away. Cheapass UPS ground shipping will get parts from there to here in two days. Freaking AutoZone will move parts that far overnight , for free!
So it took forever, fine. Then the seals arrived though, and Adam immediately spotted trouble. He thought the new seals looked weak and dry-rotted right out of the bags. Improper storage can ruin seals before they ever get installed. Because we are impatient idiots, we didn’t take the advice of our experienced, sagely mechanic and had him install the questionable seals anyway. So shortly after the build was done, this happened:
Our local dealer, of course, absolutely
refused
to issue a refund on the defective parts they sold us because we had our own mechanic install them. We remember asking at the time:
“You think my ASE-certified, incredibly reputable mechanic managed to accidentally ruin both seals at the same time? Even though he specifically told us he thought the seals were bad before he even installed them?”
They answered with some BS about not being able to know for sure. We suggested that they shouldn’t expect any future business from us or anyone who takes our consumer advice, and left.
The lesson here of course is that if you’ve gone to the trouble to find yourself a good mechanic then, for god’s sake, listen to them. A good mechanic doesn’t want you to spend more money than you have to and doesn’t want to waste your time or their own.
Ultimately, we were just pig-headed on this one. Adam told us as much, you simply never do a diff swap without putting in new output shaft seals at the same time. As with the diff bearings, it isn’t worth the trouble to try and re-use the seals. We should have ordered a fresh set long before we took the car in to do the swap. Lesson learned.
!!! UNKNOWN HEADER TYPE (MULTI-LINE BREAK?) !!!
Our Cusco RS differential has a separate gear carrier case and lid. This is an intrinsic part of clutch-based diff design and not at all unusual. However, this does make it inherently different from an open diff or the other gear-based LSDs available for the Genesis Coupe.
For example, look at the ring gear flanges on this OEM open diff (left) and Quaife LSD (right):
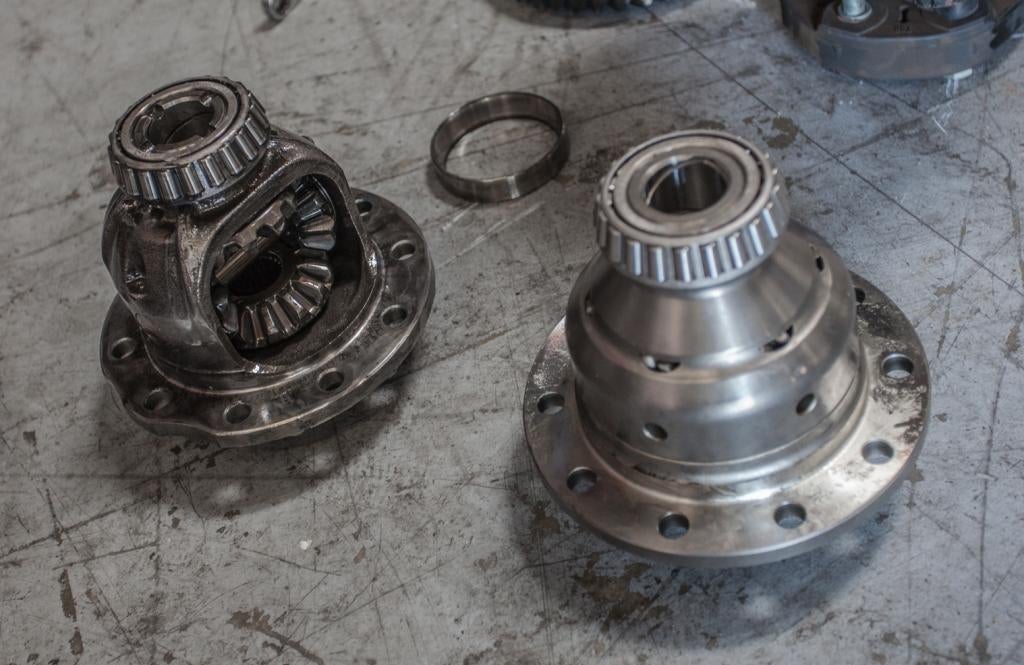 !!!CAPTION ERROR: MAY BE MULTI-LINE OR CONTAIN LINK!!!
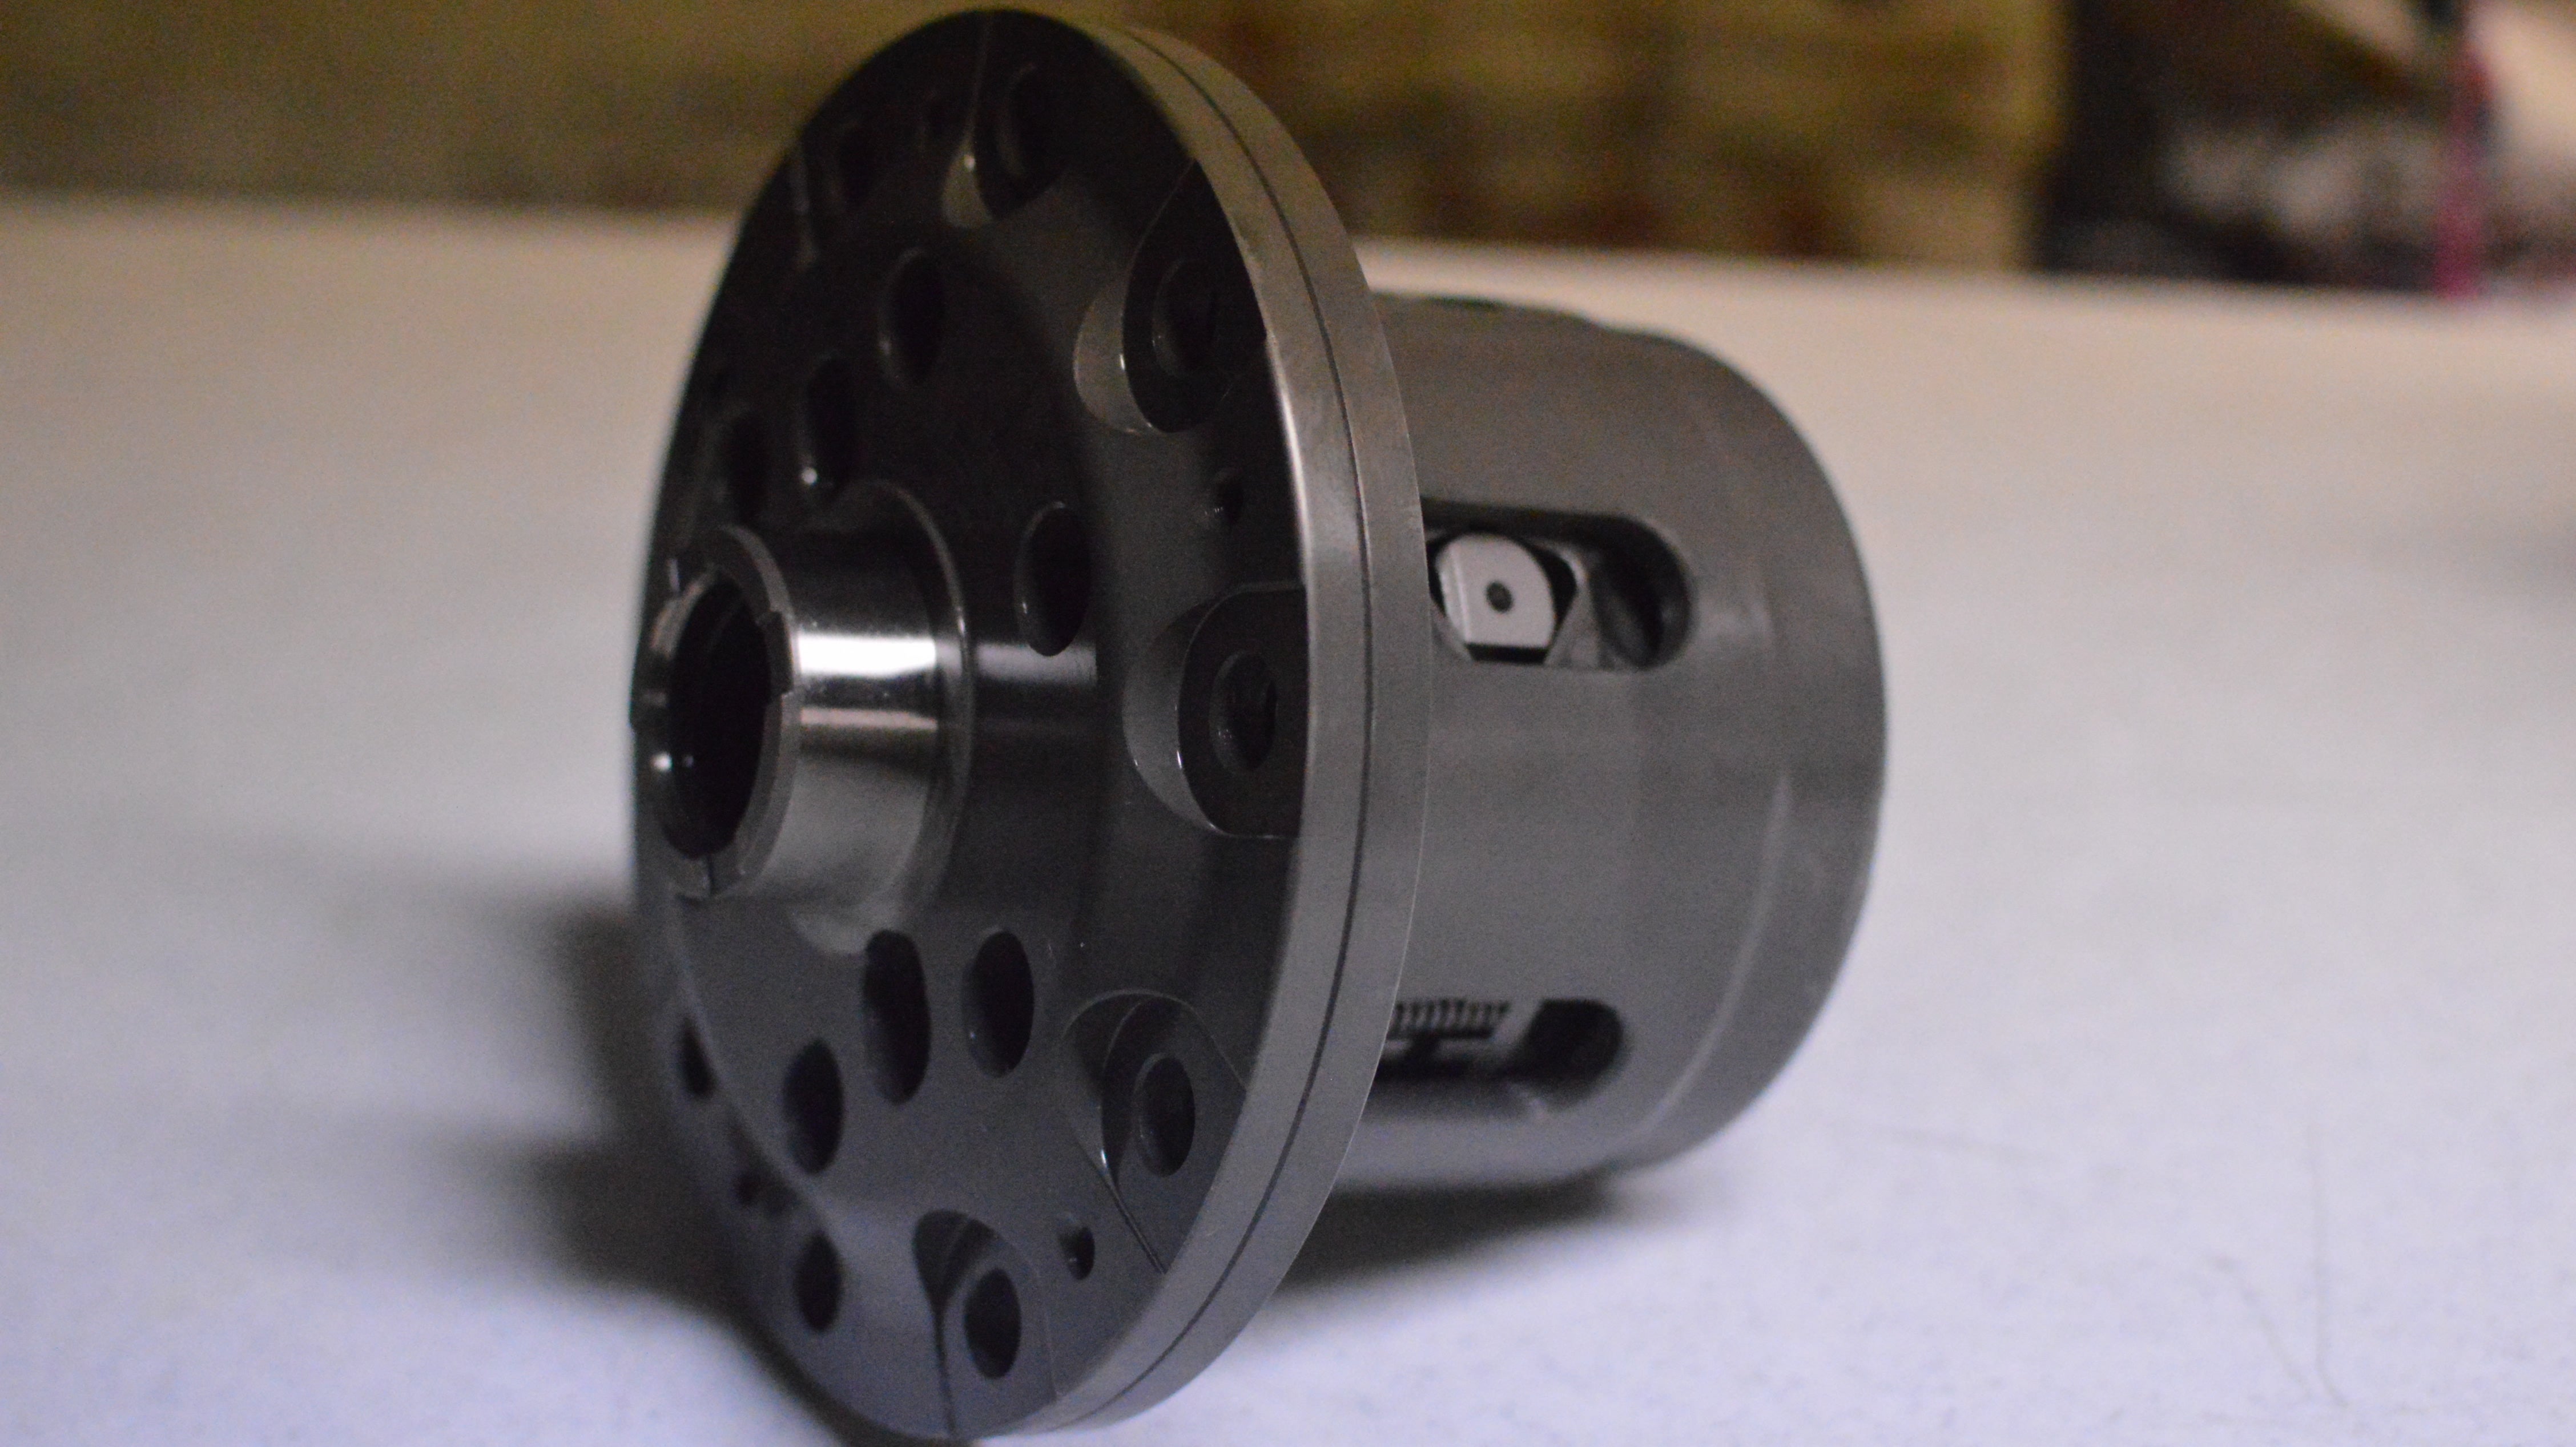
Now look at the ring gear flange on our Cusco RS:
!!! UNKNOWN HEADER TYPE (MULTI-LINE BREAK?) !!!
!!! UNKNOWN HEADER TYPE (MULTI-LINE BREAK?) !!!
That’s right, the ring gear flange on a Cusco RS is twice as thick as the flange on both OEM diffs as well as other gear-based units. It’s only a quarter inch difference, but that’s way too much in the realm of properly torqued hardware.
!!! UNKNOWN HEADER TYPE (MULTI-LINE BREAK?) !!!
Real problems began when we learned that the stock bolts are an odd size. They’re an M12 x 1.25 x 22.5mm bolt. It is highly unusual to have a super-fine 1.25 thread pitch on an M12 size shaft. 1.25 thread pitch is common on M10 bolts, but not M12. The length caused trouble too. Generic hardware is only available in 5mm increments. That meant we could get a 25mm bolt (too short) or a 30mm bolt (too long). Being too long was a real problem, because the bolt threads into a cupped hole in the ring gear. If it bottoms out in that hole, bad things happen.
To complicate matters further, these are highly stressed bolts. They need to be at least Grade 10 strength to safely do their job, preferably Grade 12 for big horsepower applications.
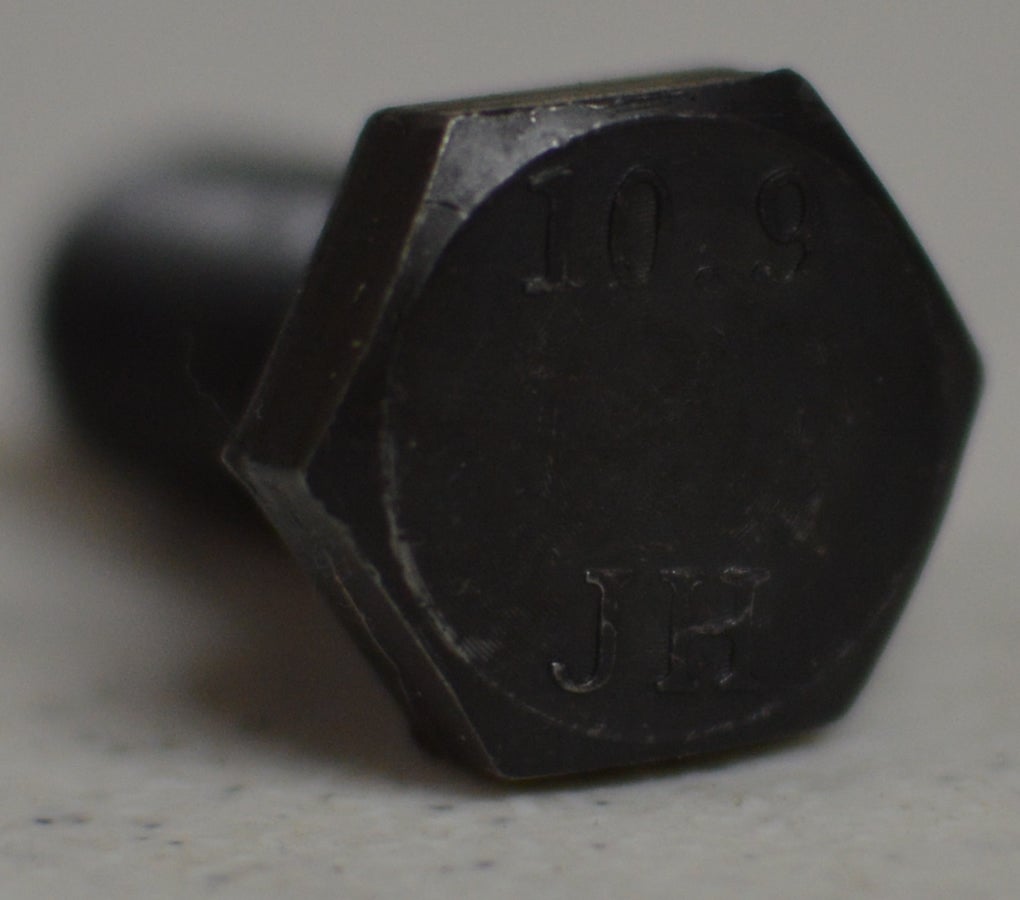
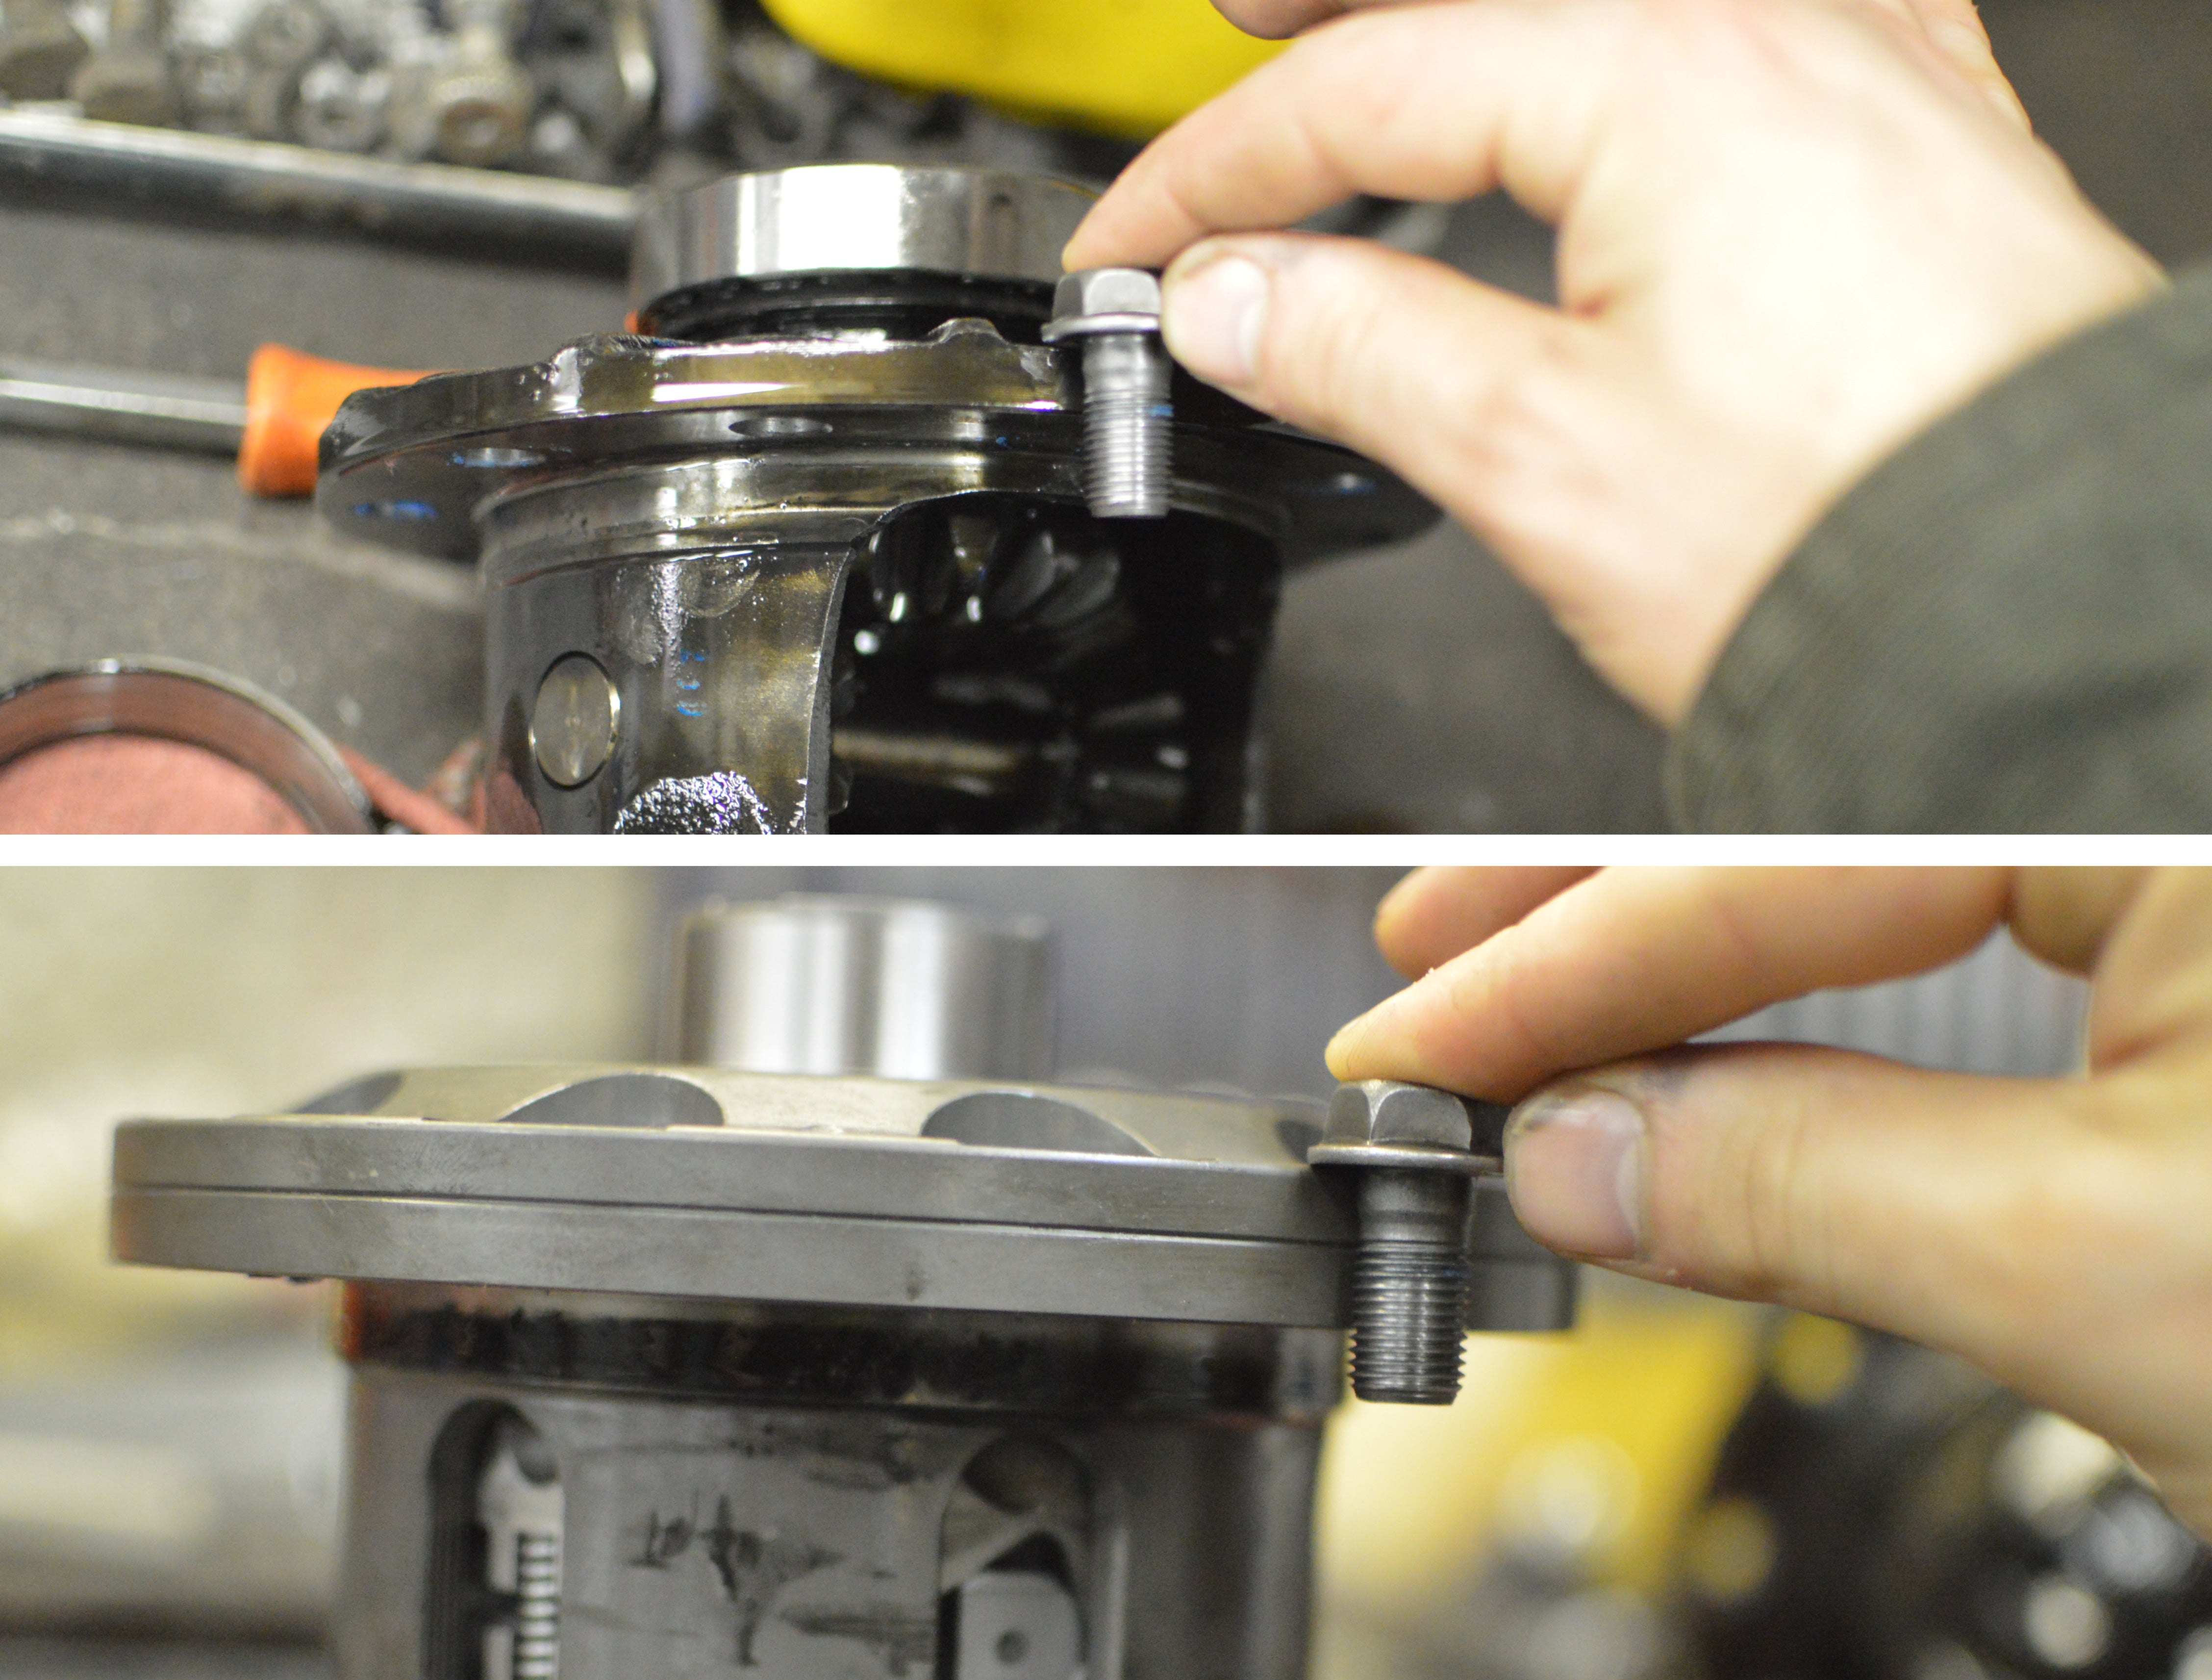
Our solution was a set of Grade 10 M12 x 1.25 x 30mm hex-head bolts paired with some through-hardened washers. Our bolts weren’t flange-head style, so they needed washers anyway. The washers were also just thick enough to take up the extra length, giving us a 28.5mm bolt. Perfect!
To be honest, the final hardware arrangement looked a bit haphazard to us. However, Adam assured us that he’s seen far sketchier setups hold together just fine on high-horsepower drag cars. The extra-fine pitch, high number of bolts, and use of thread locker results in an extremely strong installation. We’re going to break some other part of the drivetrain long before we have trouble with these bolts.
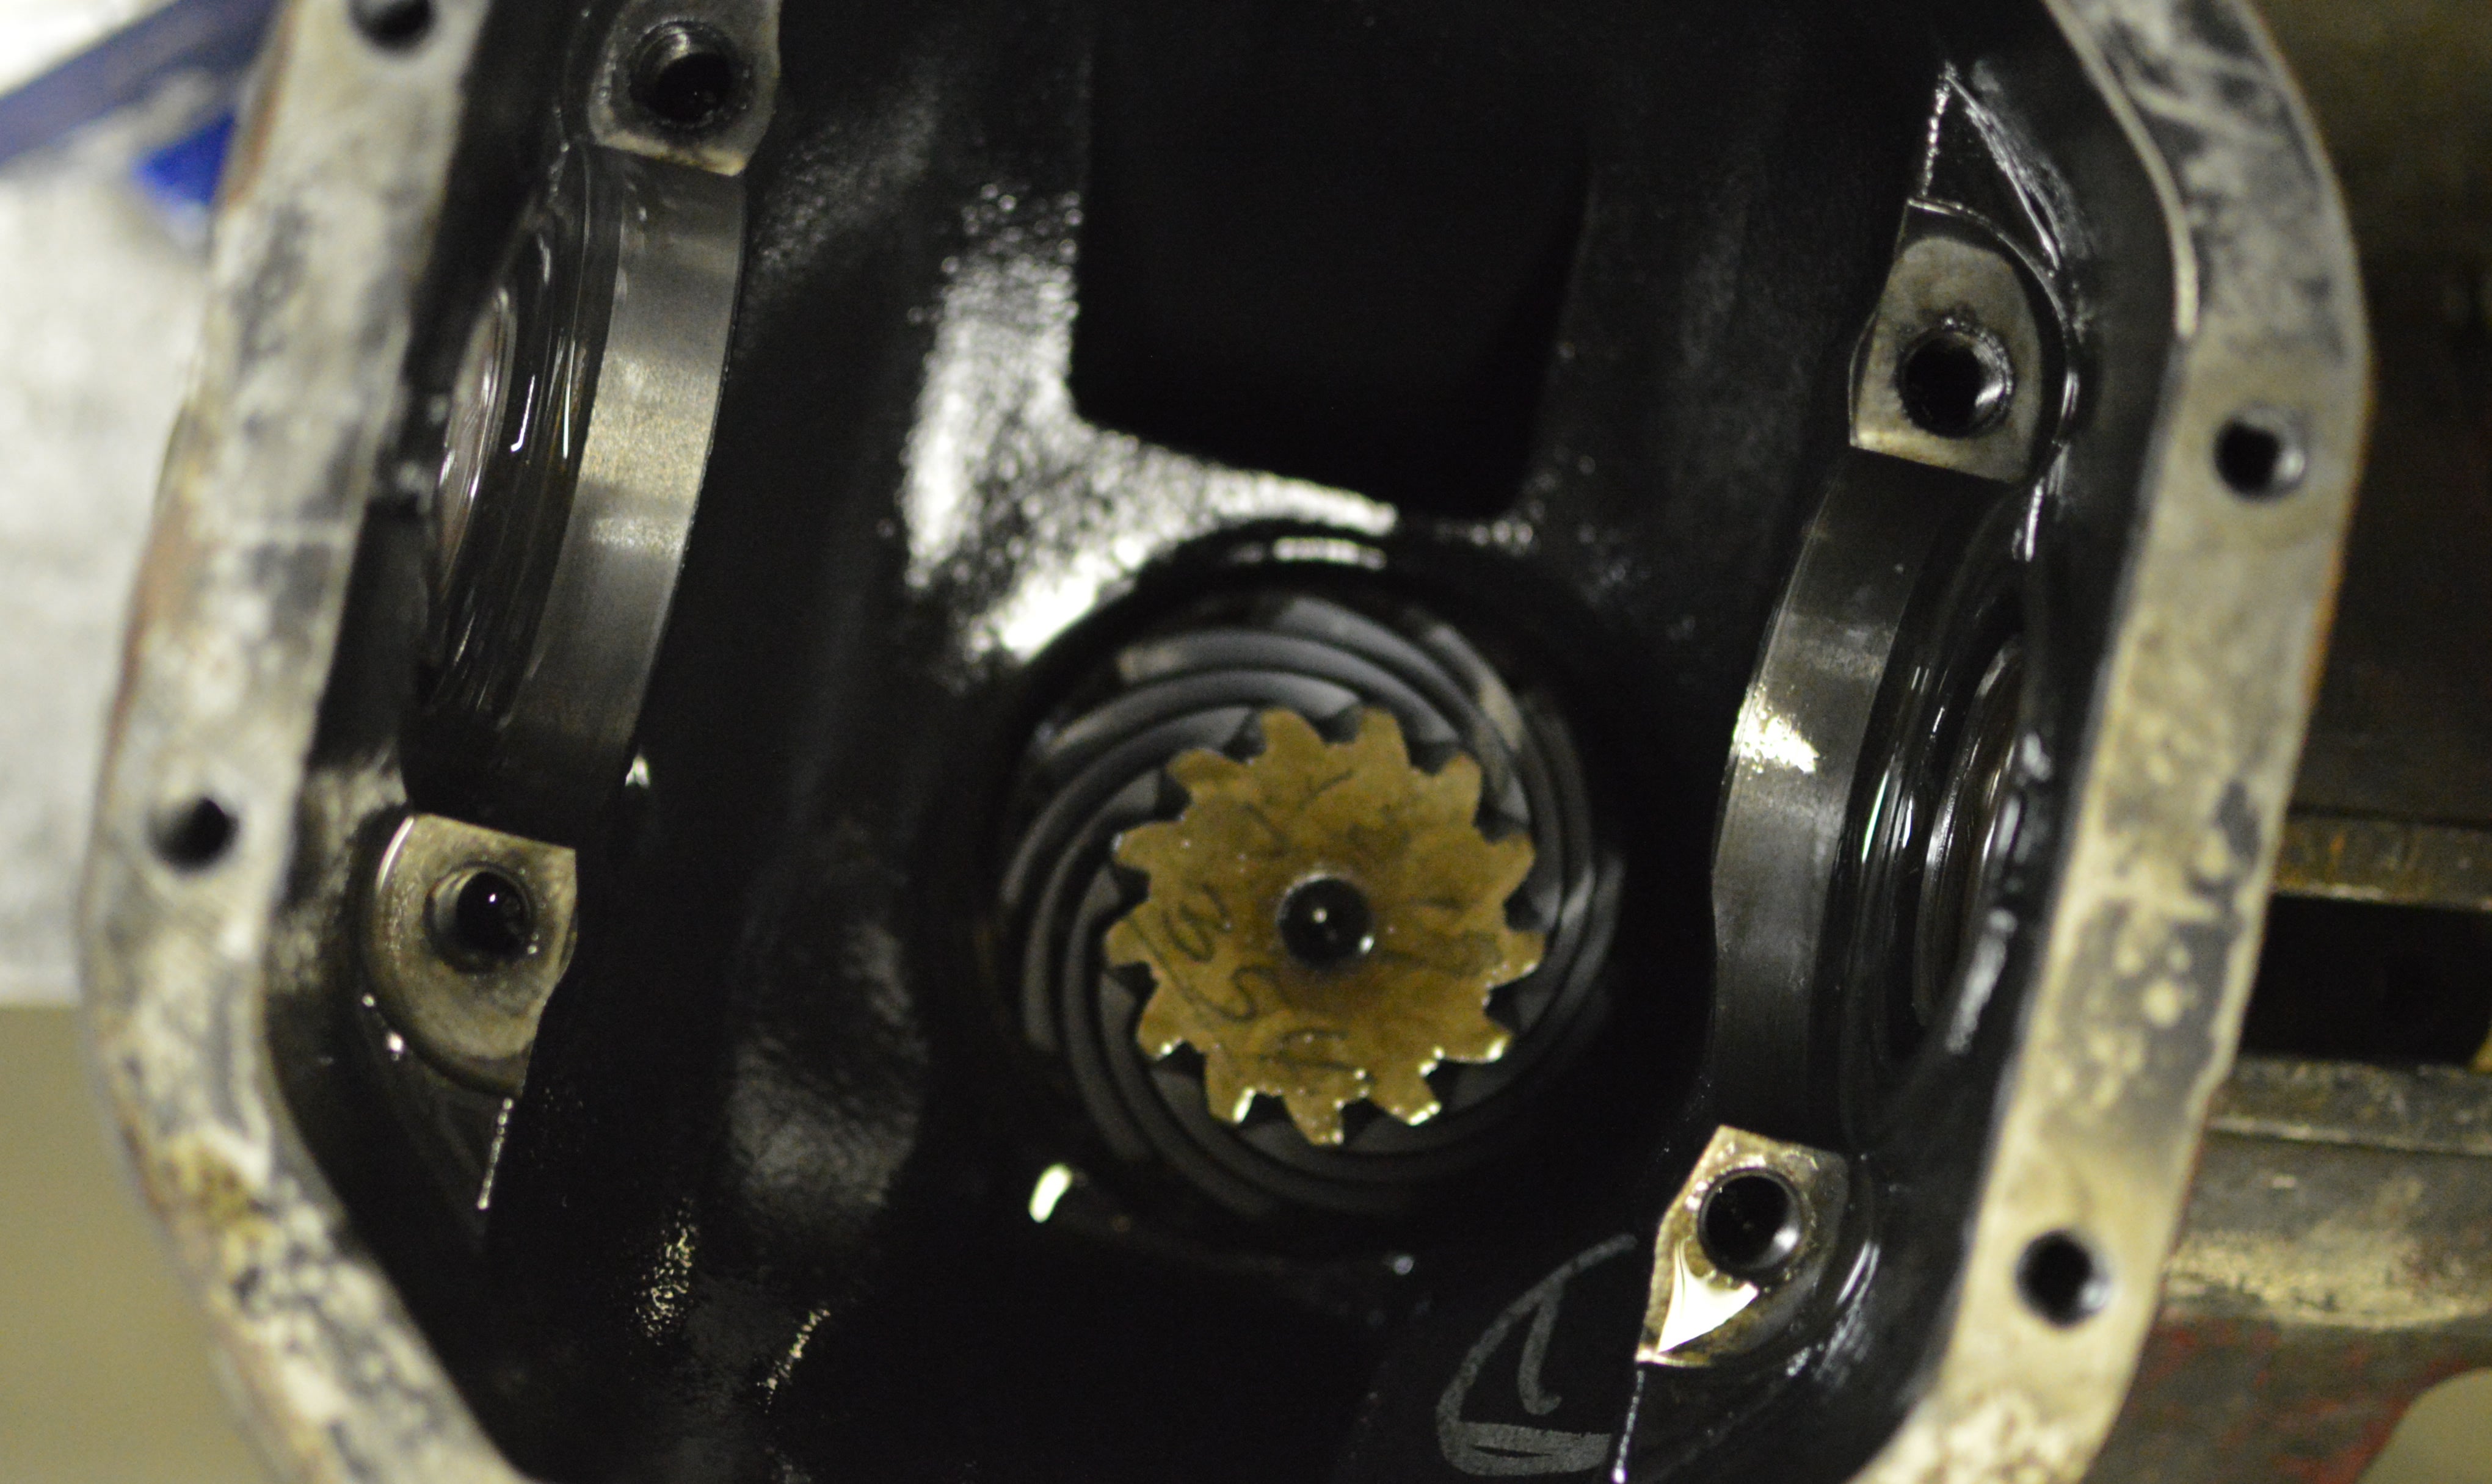
!!! UNKNOWN HEADER TYPE (MULTI-LINE BREAK?) !!!
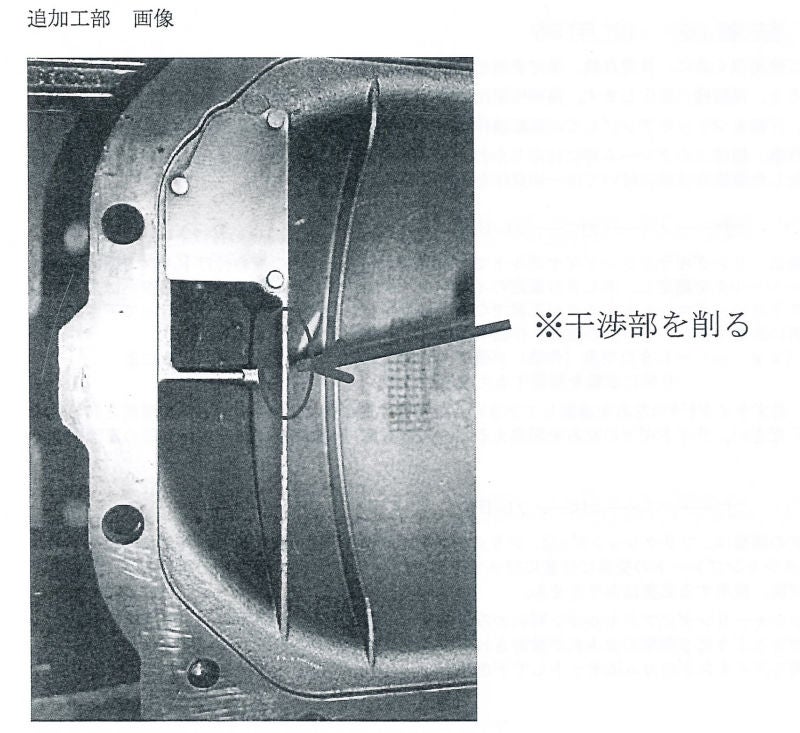
Turns out, these instructions are a warning about how the Cusco RS will make contact with this little oil baffle on the inside of the diff cover. The contact is small and limited to the material depicted within the circle. A little light ‘clearancing’ with a grinder sorts it out easily.
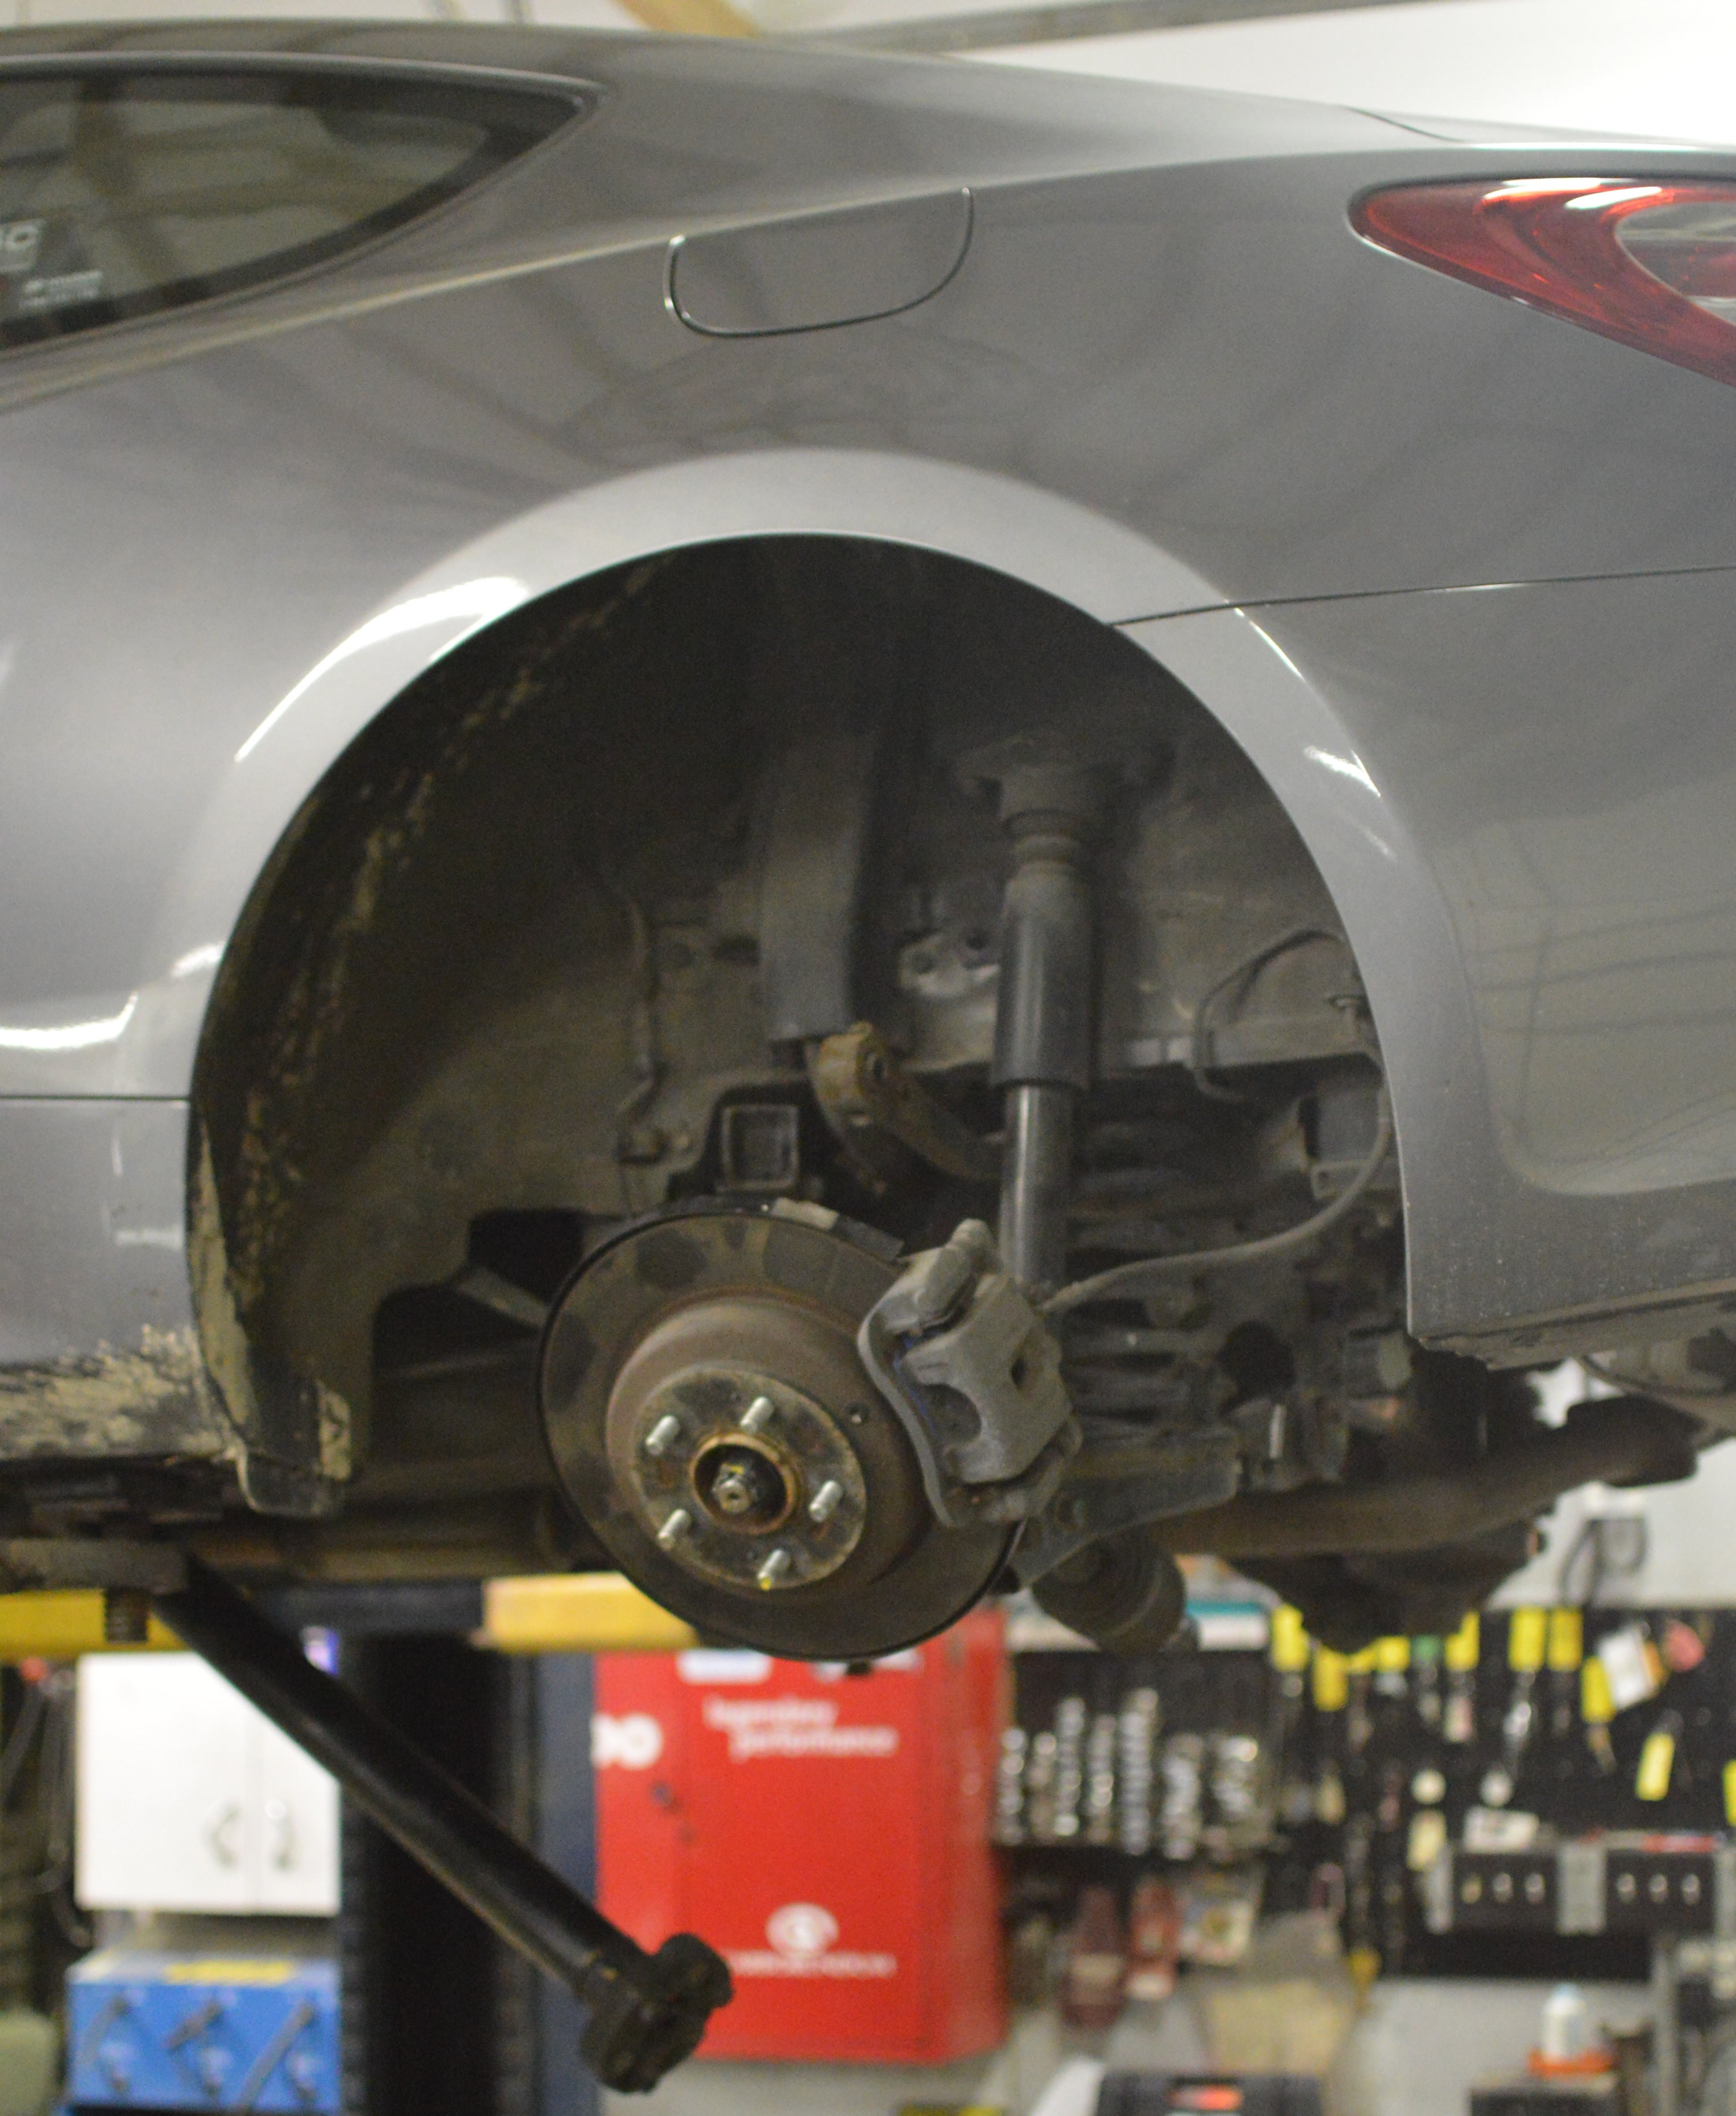
With this final hurdle cleared, Project Hoondy mercifully went back together without further incident. We’d at least been smart enough to order a fresh set of diff carrier bearings and Adam pressed them into place.
We lucked out on the final variable of the build because the Cusco RS was exactly the same width as the OEM open diff. This is amazing, to be honest, and very helpful. If the Cusco was even slightly wider or narrower then we would have needed a different set of shims which would have further delayed the project.
!!! UNKNOWN HEADER TYPE (MULTI-LINE BREAK?) !!!
At long last, Project Hoondy was a complete car once more, but we’d paid dearly for it. We were plagued by all the little details on this build. Through some great discounts, we managed to get our hands on a fully WPC-treated Cusco RS for only $1900 shipped. A great start, but then we were brutally nickle-and-dimed:
Output shaft oil seals: $90
Diff bearings: $140
30mm M12 hardware: $60
Oil seals again: $75
Labor: $300
Which put us over $2500 for the full Cusco RS diff conversion. We’d known it was going to be expensive, but had hoped to do a little better than that. We weren’t sure how to feel about the final sticker price, but decided to reserve judgement till after we’d had a chance to experience the changes from the driver’s seat.
So, was it worth all the pain and agony, both in our hearts and wallets?
Short answer: hell yes!
How much hell yes? Stay tuned to find out in !!!error: Indecipherable SUB-paragraph formatting!!! of !!!error: Indecipherable SUB-paragraph formatting!!!
!!! UNKNOWN CONTENT TYPE !!!
 Justin Hughes
> Zachary Oberle
Justin Hughes
> Zachary Oberle
08/02/2016 at 13:21 |
|

|
Zachary Oberle
> Justin Hughes
08/02/2016 at 15:25 |
|

Haha, love that the first comment was someone who got this reference.
 noselunting
> Zachary Oberle
noselunting
> Zachary Oberle
08/02/2016 at 20:36 |
|
What’s WPC treatment?
|
Zachary Oberle
> noselunting
08/02/2016 at 23:16 |
|
WPC Treatment is a super-advanced, dimentionally stable metal-improvement process. Like a combination of both shot-peening and low-friction coating, WPC is a best-of-both-worlds solution that makes metal parts both slicker and more durable.
The results of WPC treatment are obvious, as shown by this before-and-after photo from our previous article :

We wrote extensively about the details of WPC in the article before that .
If you are interested, Mike Kojima wrote a more in-depth piece which is what turned us on to the benefits of WPC treatment in the first place.
WPC has numerous benefits, and is actually at its best outside of the engine. Manual transmissions and differentials hugely benefit from WPC by way of both increased smoothness and durability. We have a strong desire to apply WPC to the often-troublesome synchronizers in our Genesis Coupe’s manual transmission.
This won’t be the last you’ll see of WPC on Project Hoondy. We’ll be covering it more in future articles.
Stay Tuned!
|
noselunting
> Zachary Oberle
08/03/2016 at 08:17 |
|
Interesting, thanks!